Advanced filtering with SELECT fields.
For using any advanced filtering option, all filter triggering elements (buttons, search field, checkboxes, radio buttons, etc) have to be inside the FORM.
You also will have to use some extra jQuery code snippet, which I recommend to put in the separate .js file
Creating content for filtering
Main settings, which is necessary for make your content filtered is:
- container with filtered content should have an ID (we are using #container)
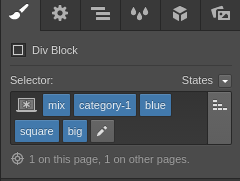
-all items, which will be filtered SHOULD have class .mix
For filter your content in several dimensions (size, color, etc...) all you need is add a combo classes to the elements.
For example, one element can have classes "category-1", "blue", "big", "square".

Creating filtering menu
MixItUp will "read" the value of the input fields with type "select" and will react when checkbox will be checked.
First of all, you have to add a FORM to the page and give it an ID (I used #filterform)
Then, inside the form you can add as many select fields as much filter dimensions you will have (form, size, etc...). Inside the every select field you can add all options for filtering in particular dimension. Every option will have a VALUE equal to certain class name.

Option "All" will have no value.
Along with that you have to wrap every filter group (select field+title) in a div and give a class. You will need it for further connection with the plugin code.
Add a RESET button
For fast and easy clean all the filters we can use "Reset" buttons.
All you will need for that is a link-block or standard Webflow button with ID "reset".
Important note: button or link should be INSIDE THE FORM.
Create .js file for advanced filtering settings.
I recommend creating separate .js file for using advanced filtering settings, because Webflow limit custom code size to 5000 characters.
// To keep our code clean and modular, all custom functionality will be contained
// inside a single object literal called "dropdownFilter".
var dropdownFilter = {
// Declare any variables we will need as properties of the object
$filters: null,
$reset: null,
groups: [],
outputArray: [],
outputString: '',
// The "init" method will run on document ready and cache any jQuery objects we will need.
init: function(){
var self = this;
// As a best practice, in each method we will asign "this" to the variable "self"
// so that it remains scope-agnostic. We will use it to refer to the parent "dropdownFilter"
// object so that we can share methods and properties between all parts of the object.
self.$filters = $('#filterform');
self.$reset = $('#reset');
self.$container = $('#container');
self.$filters.find('.select-filter-block').each(function(){
self.groups.push({
$dropdown: $(this).find('select'),
active: ''
});
});
self.bindHandlers();
},
// The "bindHandlers" method will listen for whenever a select is changed.
bindHandlers: function(){
var self = this;
// Handle select change
self.$filters.on('change', 'select', function(e){
e.preventDefault();
self.parseFilters();
});
// Handle reset click
self.$reset.on('click', function(e){
e.preventDefault();
self.$filters.find('select').val('');
self.parseFilters();
});
},
// The parseFilters method pulls the value of each active select option
parseFilters: function(){
var self = this;
// loop through each filter group and grap the value from each one.
for(var i = 0, group; group = self.groups[i]; i++){
group.active = group.$dropdown.val();
}
self.concatenate();
},
// The "concatenate" method will crawl through each group, concatenating filters as desired:
concatenate: function(){
var self = this;
self.outputString = ''; // Reset output string
for(var i = 0, group; group = self.groups[i]; i++){
self.outputString += group.active;
}
// If the output string is empty, show all rather than none:
!self.outputString.length && (self.outputString = 'all');
//console.log(self.outputString);
// ^ we can check the console here to take a look at the filter string that is produced
// Send the output string to MixItUp via the 'filter' method:
if(self.$container.mixItUp('isLoaded')){
self.$container.mixItUp('filter', self.outputString);
}
}
};
Don't forget to change parameters in the code if you will use different classes or IDs


Create a .js file with the code above and host it in any cloud service (Dropbox, Google Drive, etc), so you could use the public link to it and connect that file to your site.
Connecting plugin
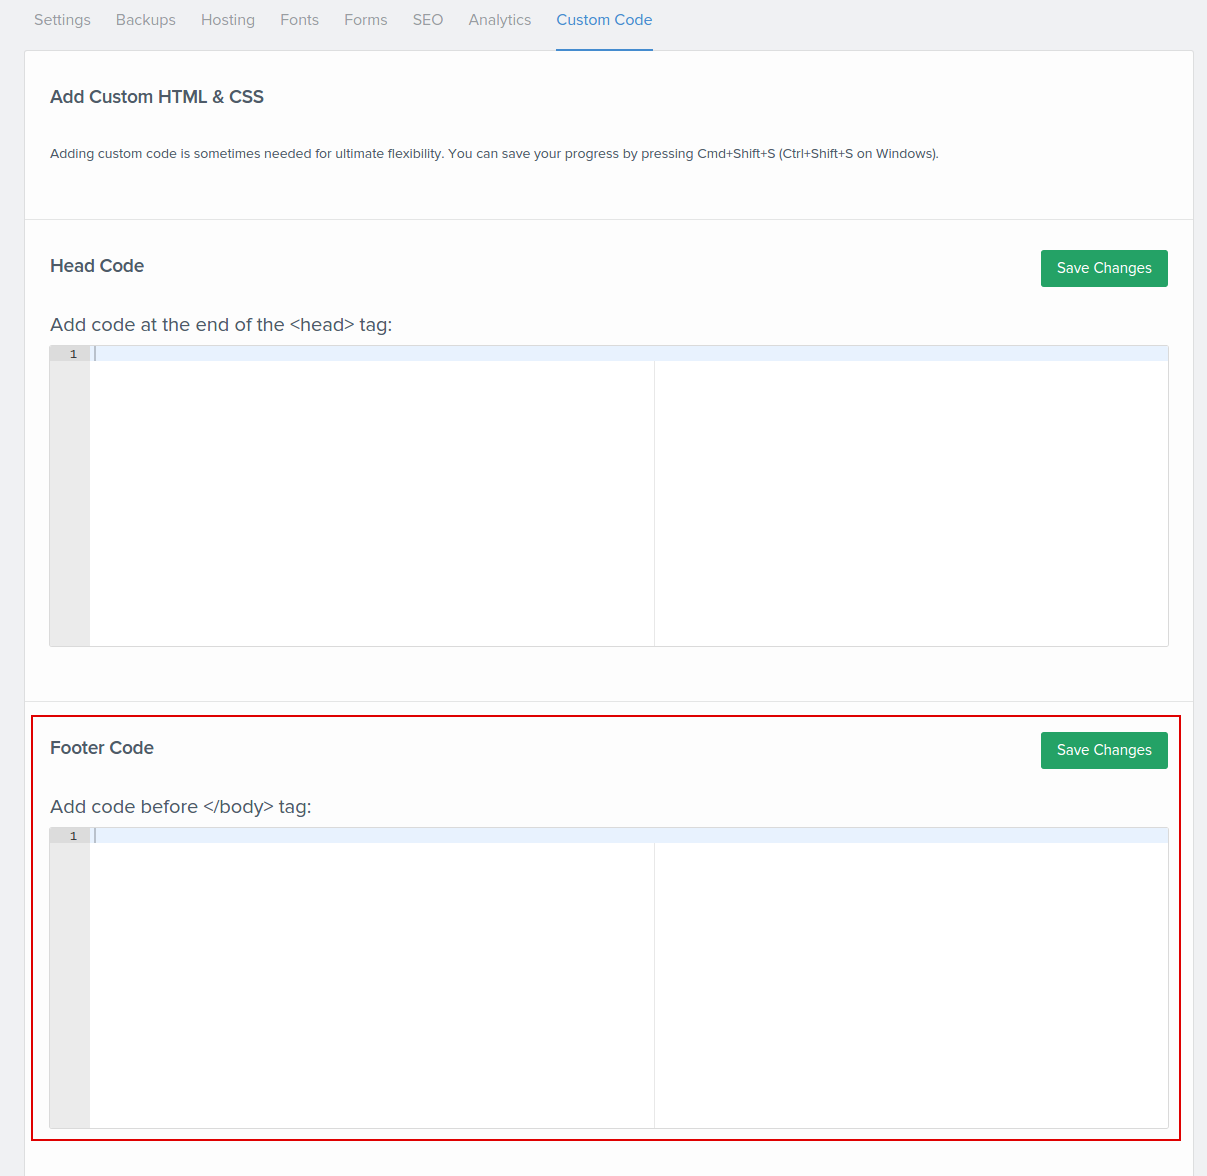
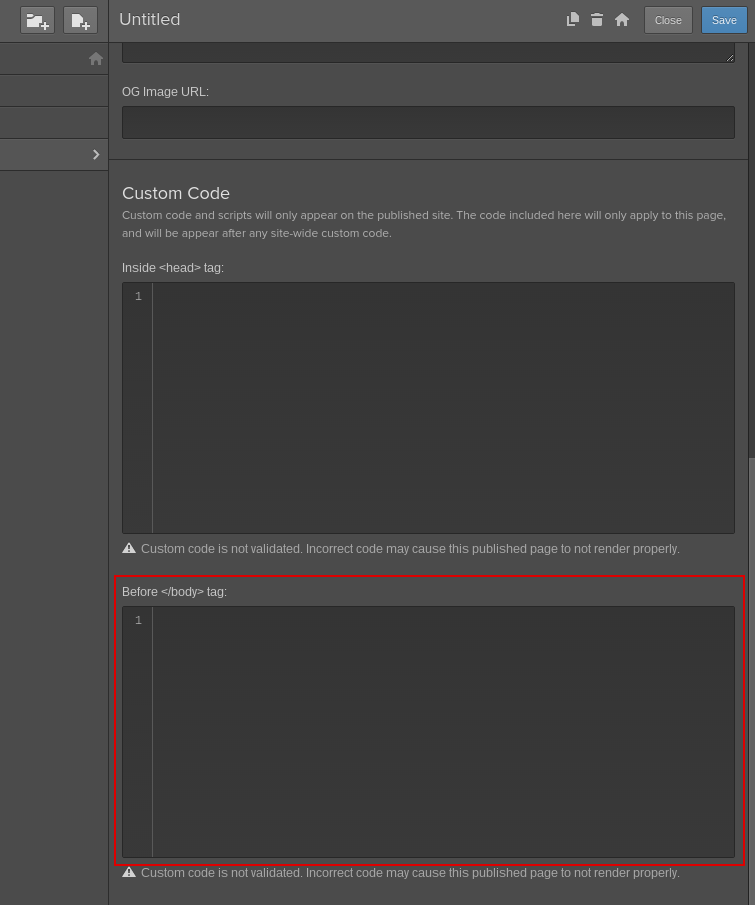
For connect this plugin you will have to add custom code to the site settings (pic1) or page settings (pic2) before </body> tag.


As I mentioned in the general setup (mixitup-main), first you will need a link to main .js file of plugin.
In my case I used public link
<script src="http://cdn.jsdelivr.net/jquery.mixitup/latest/jquery.mixitup.min.js" type="text/javascript"></script>
Nex line, we are connecting advanced filtering .js file:
<script src="link to your hosted file here" type="text/javascript"></script>
After this line of code you have to add a code, which will call jQuery plugin.
<script>
// On document ready, initialise our code.
$(document).ready(function($){
// Initialize dropdownFilter code
dropdownFilter.init();
// Instantiate MixItUp
$('#container').mixItUp({
controls: {
enable: false // we won't be needing these
},
callbacks: {
onMixFail: function(){
alert('No items were found matching the selected filters.');
}
}
});
});
</script>
MixitUp Search function
There is also exist code snippet, which will let you to have a search function for your filtering content
(credits http://codepen.io/edprats/pen/pzAdg).
1) Add an input field with type="search" inside the form (use embed code)

2) Add an extra piece of code to the snippet in the footer area
 //search filtering
//credits http://codepen.io/edprats/pen/pzAdg
var inputText;
var $matching = $();
var delay = (function(){
var timer = 0;
return function(callback, ms){
clearTimeout (timer);
timer = setTimeout(callback, ms);
};
})();
$(".cd-filter-content input[type='search']").keyup(function(){
// Delay function invoked to make sure user stopped typing
delay(function(){
inputText = $(".cd-filter-content input[type='search']").val().toLowerCase();
// Check to see if input field is empty
if ((inputText.length) > 0) {
$('.mix').each(function() {
var $this = $(this);
// add item to be filtered out if input text matches items inside the title
if($this.attr('class').toLowerCase().match(inputText)) {
$matching = $matching.add(this);
} else {
// removes any previously matched item
$matching = $matching.not(this);
}
});
$('.itembox').mixItUp('filter', $matching);
} else {
// resets the filter to show all item if input is empty
$('.itembox').mixItUp('filter', 'all');
}
}, 200 );
});
Last important detail.
Before we get to the finish, there is one small but crucial CSS rule you must add to the project:
filtering elements should have setting display:none
So, do not forget to apply display:none to class .mix before publish the site
When MixItUp plugin will load, it will add the display value as an inline-style (the default is “inline-block”).
Publish you site and enjoy plugin!
Good luck!


